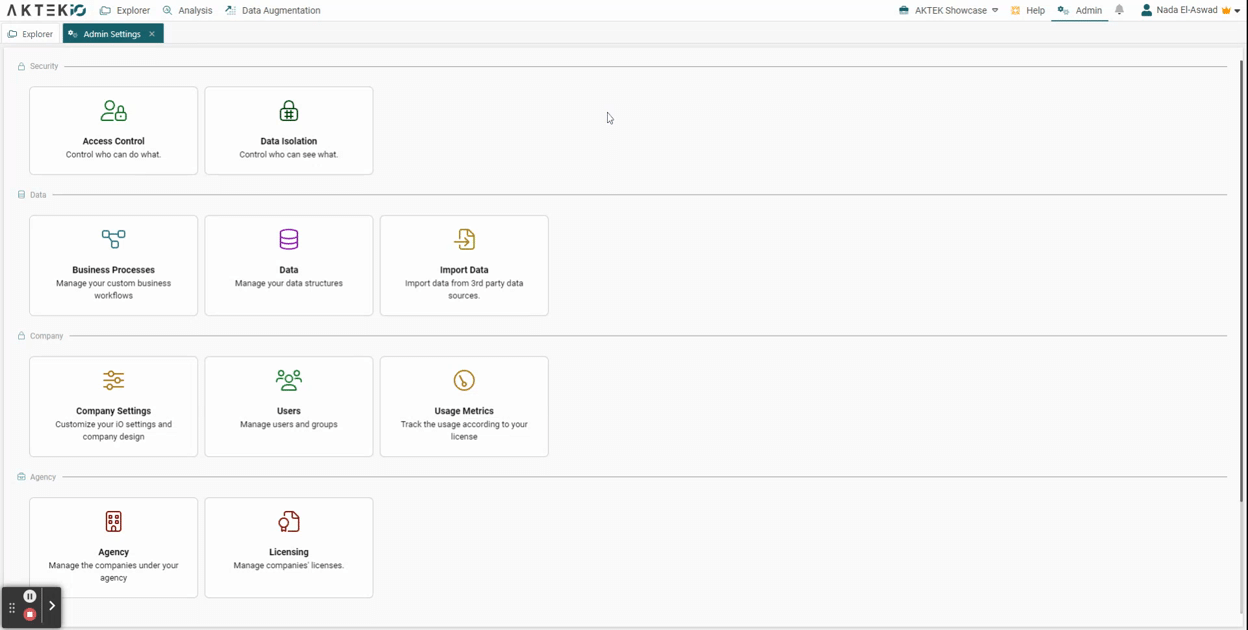
Admin users can adjust company-wide features to match their company's security requirements
Table of contents
Default Features of the Company
Go to Admin > Company Settings > iO settings
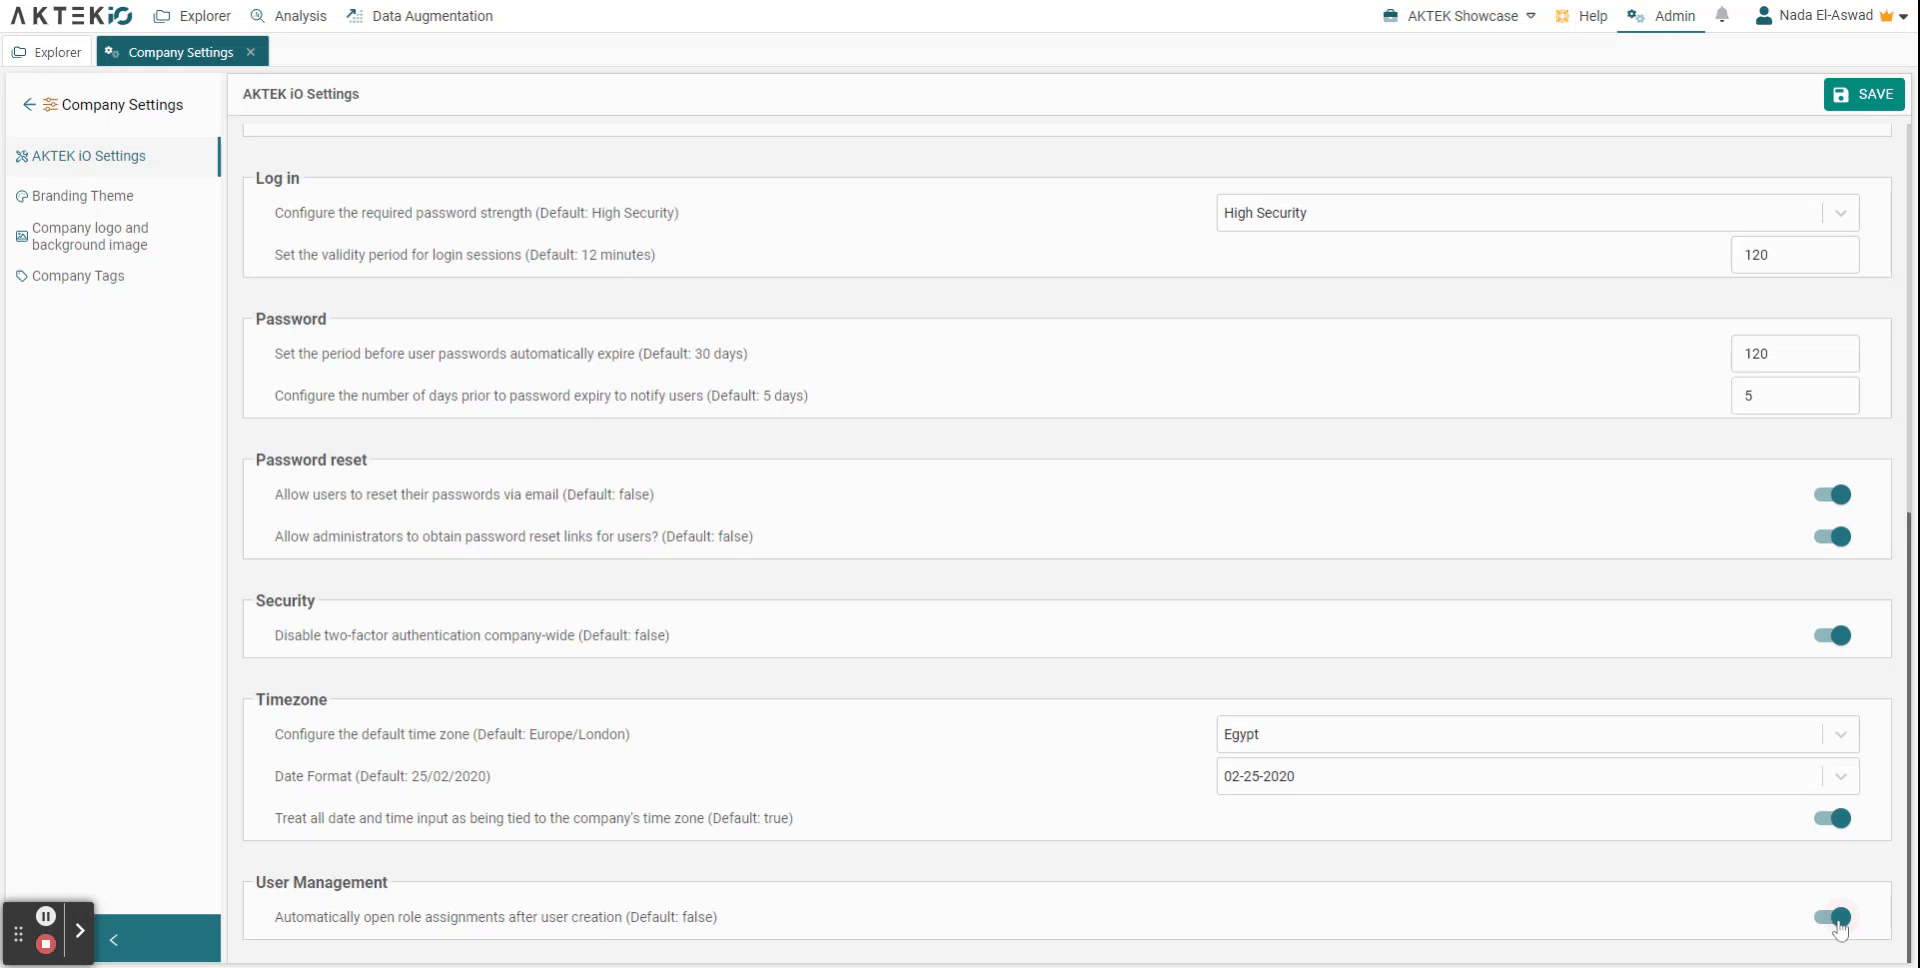
AKTEK iO Settings will open an editable panel for any user with permission to turn the following features ON or OFF for the entire company:
- Account Freezing will allow any admin user to freeze or pause a user account without erasing or deactivating the account. Toggle the ON/OFF icon from red to green on Allow administrators to manually freeze user accounts? option. Refer to the Users and Roles section of this Helpdesk for more details.
- Under Security, you can disable the Two-factor Authentication (2FA) company-wide (except for super admins roles). We strongly recommend keeping it off, so all users need to insert the 2FA code sent in their emails.
- Timezone allows AKTEK iO to treat all date/time input as tied to the company time zone. For this, you can select the timezone your company is in (e.g. Europe/London) and change the Date format (e.g. DD/MM/YYYY) to match your organization’s language.
- Geo will allow you to set the map's default view in the whole system:
- Under Coordinates, enter the center of your area of interest as latitude, and longitude in the decimal format.
- Under Zoom level, enter the desired zoom level around the center set above.
- Set the values and watch the map change until you reach the desired default view.
- You can also use the mouse to move the map and change the zoom level until you reach the desired default view. Notice that the numbers to the left will change accordingly.
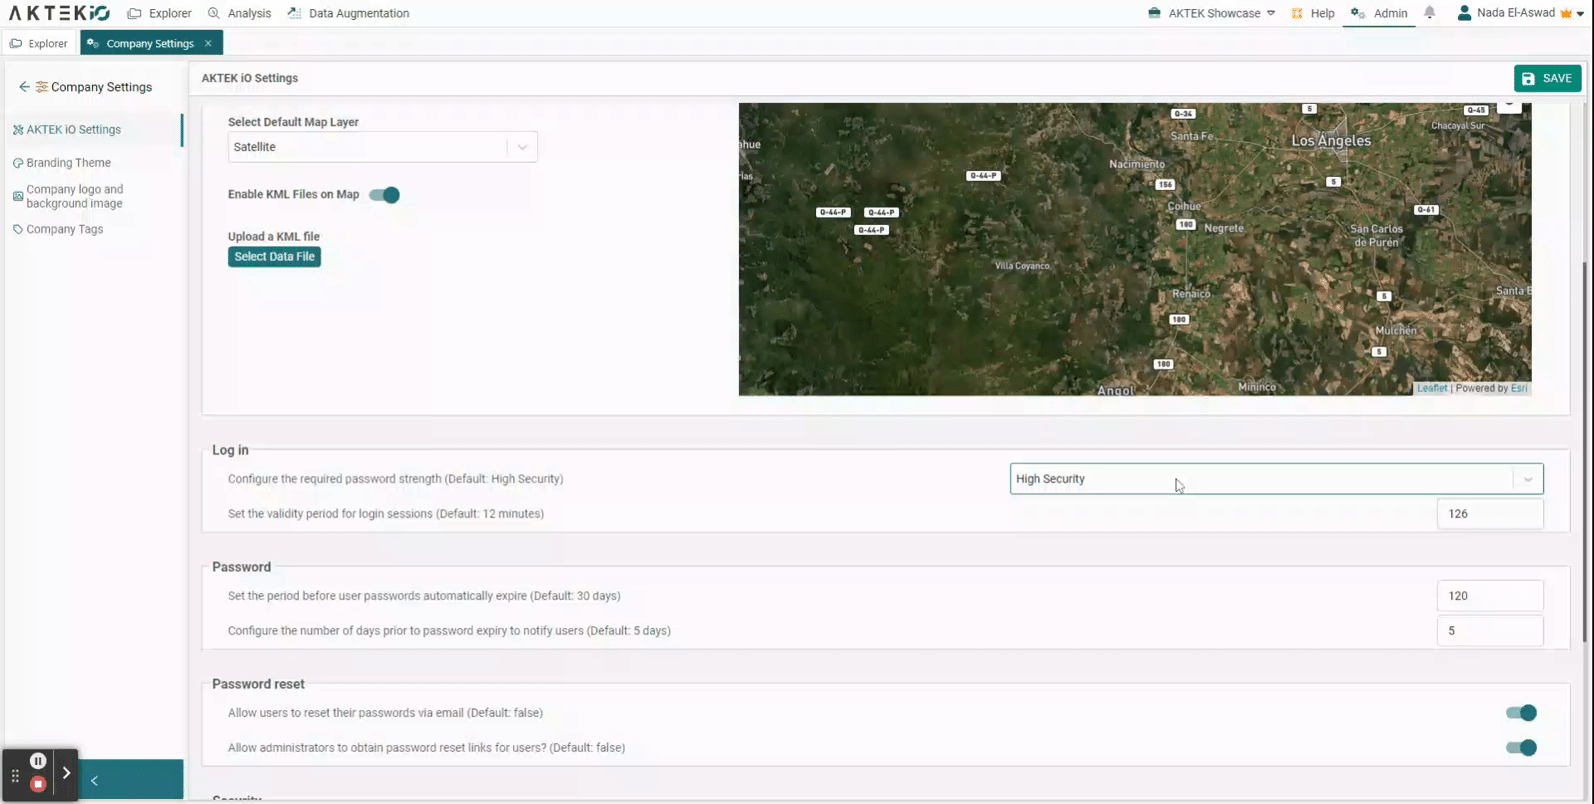
- Select default map layer will allow you to define the default base layer (Street, Satellite, Topographic) to show on all maps in iO.
- Enable KML files on the map will allow you to upload a KML/KMZ file that will show automatically on every map in the system (The KML layer can be manually disabled on specific maps if desired).
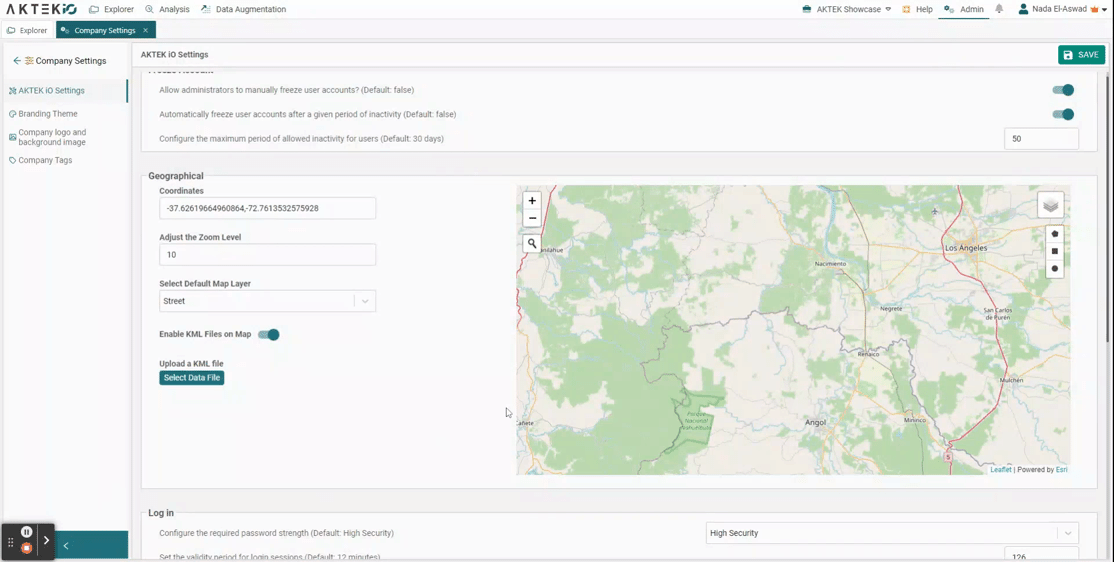
- Login determines the number of minutes a login session will remain valid for any company user. Type in a new number to change the number of minutes (e.g., 120 for 2 hours). When the number of minutes has passed, the user will be asked to log in again and input their email and password for extra security;
-
Login also allows you to select the strength required for any user’s password. You can select from:
- Low security: Level 0 – too guessable: risky password. (guesses < 10^3)
- Low-Medium Security: Level 1 – very guessable: protection from throttled online attacks. (guesses < 10^6)
- Medium Security: Level 2 – somewhat guessable: protection from unthrottled online attacks. (guesses < 10^8)
- Medium-High Security: Level 3 – safely unguessable: moderate protection from offline slow-hash scenario. (guesses < 10^10)
- High Security: Level 4 – very unguessable: strong protection from offline slow-hash scenario. (guesses >= 10^10)
-
On Password, you will be able to select a timeframe after which your users’ password will automatically expire alongside the timing for notification. You can do it by changing the number of days on the right.
-
To allow any user of the company to reset their password via email, toggle the ON/OFF icon from red to green for the Allow users to reset their own password via email? option. Users will be able to click Reset Password every time the wrong credentials are supplied during login.
To allow admin users to send a reset link, toggle the ON/OFF icon from red to green for the Allow administrators to obtain a password reset links for users? option.

⚠️ Don't forget to click Save to register the changes.
⚠️ If you toggle Treat all date/time input as tied to the company time zone (Default: true) ON, this will affect all date/time fields in your AKTEK iO account.
⚠️ If your AKTEK iO instance is set up on-premise, without a mail server configured, reset a password will generate a unique link for the admin to copy and manually share with the user via email or other means. For security, this link will only be valid once.
💡 Make sure all of your new users have a role assigned by toggling ON the option to automatically open role assignment after user creation.
Design Settings
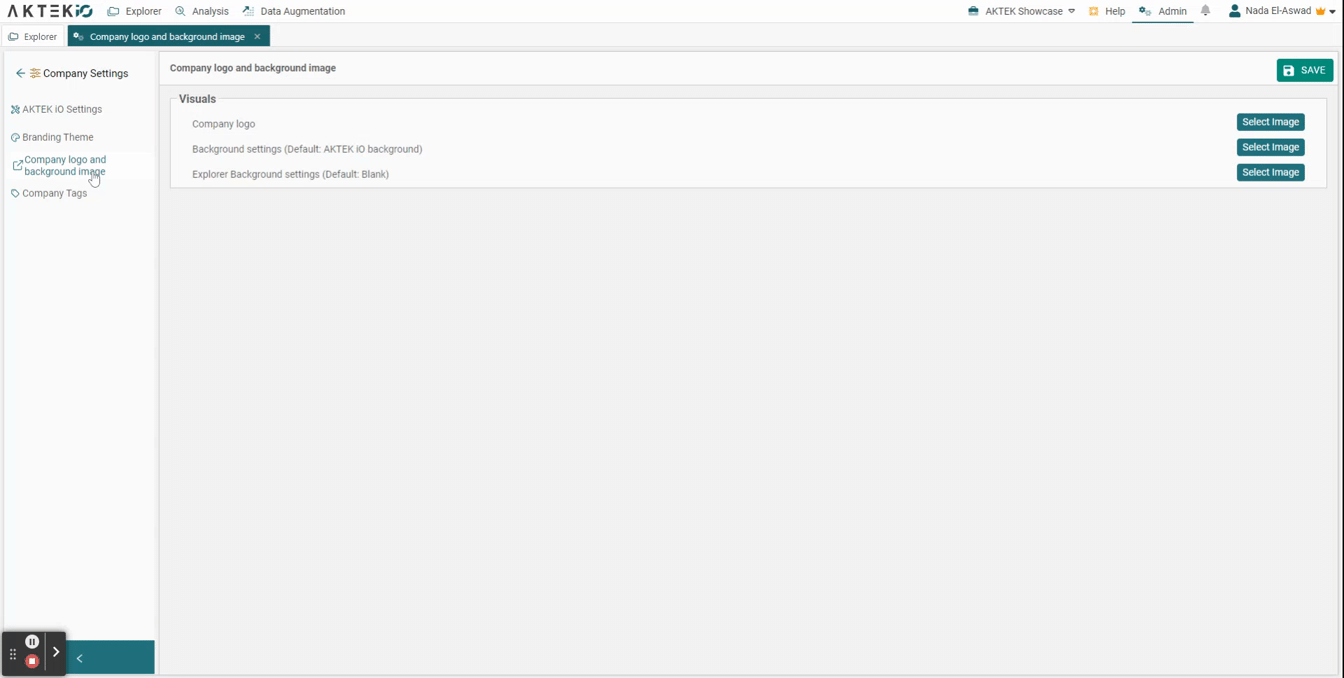
With our Design Settings feature, clients with access to this add-on feature can select their logo and background images for login and landing pages.
You need to be a White-label customer to see the subsections below under Company Settings.
Logo and Background
-
To do it, click on Select File and upload an image file from your device;
-
To replace an image file, click Clear and upload a new file, as done in the previous step.
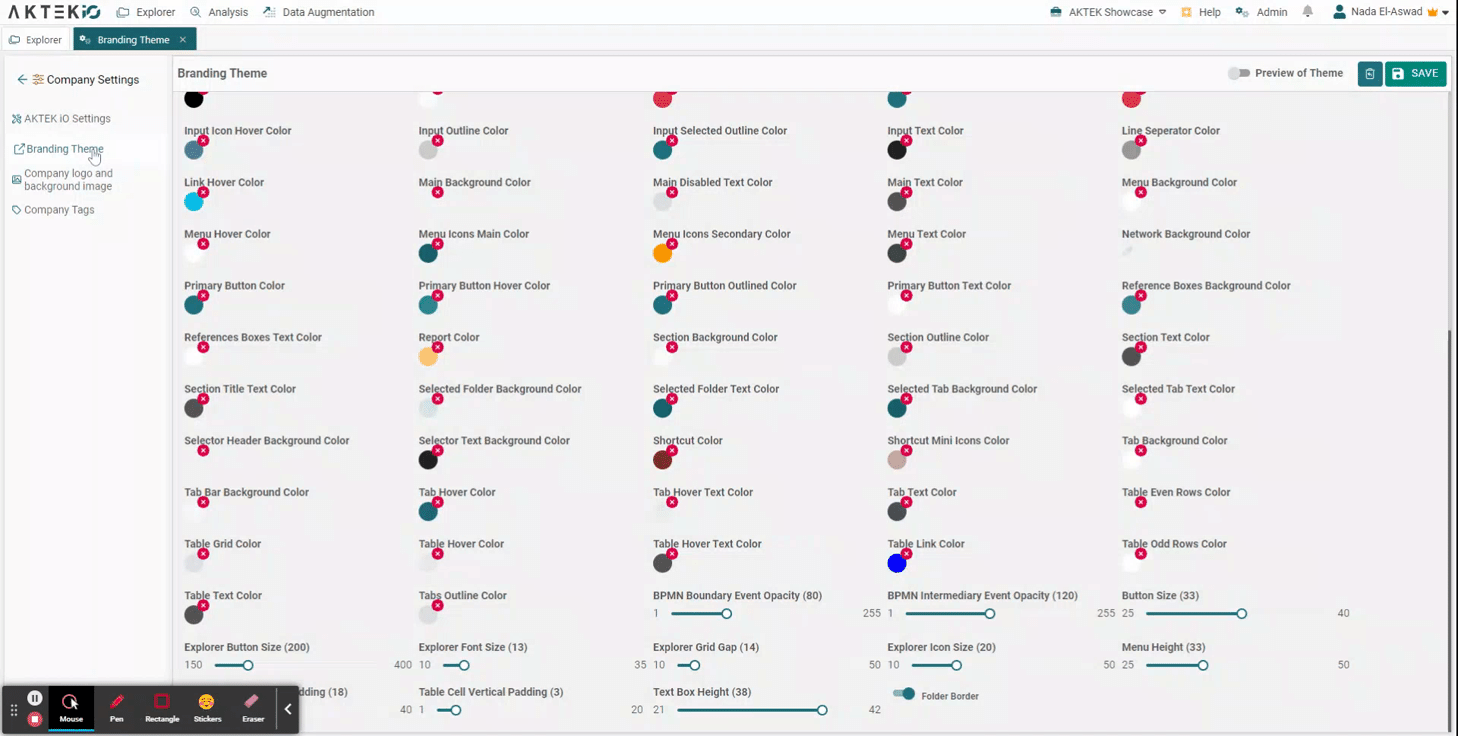
Branding Theme
-
Edit the theme settings to customize all AKTEK iO buttons and colors to match your organization’s branding theme;
-
Click on Export Theme to share a theme configuration with another AKTEK iO user. Any AKTEK iO user with access to Design Settings will also be able to import any exported theme;
-
In this section, you can also control the size of the icons (of folders and reports), the size of the font, and many other settings allowing you to match the full platform with your brand.
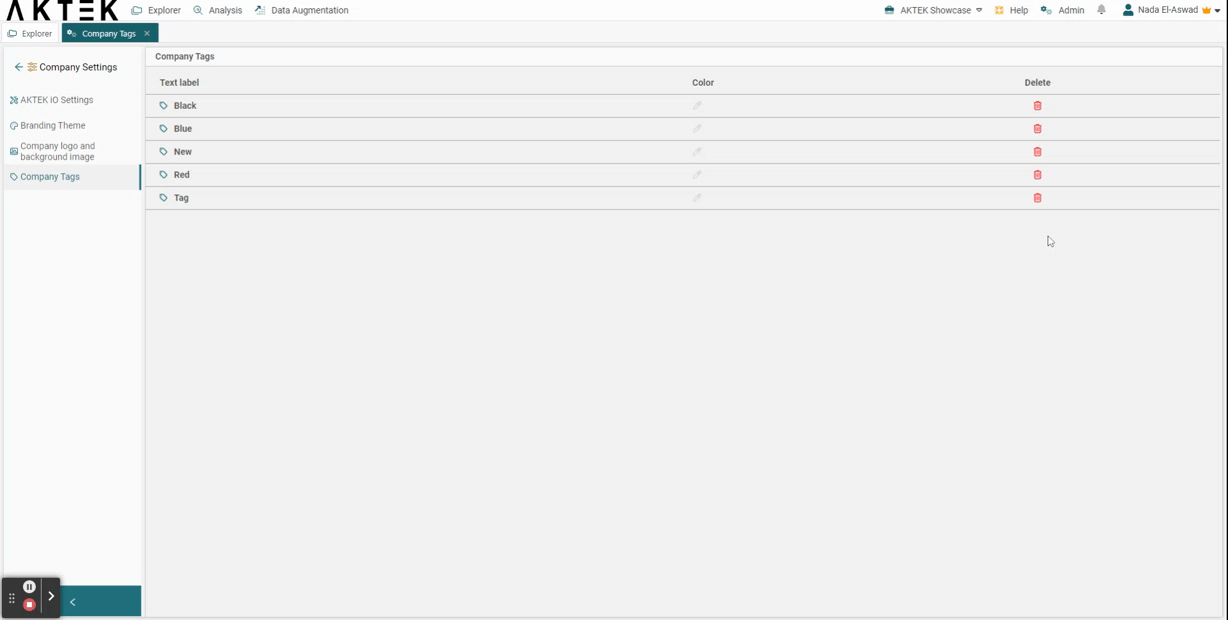
Company Tags
-
Under Company Tags, you will find all the tags created by different users (those given create permission);
-
Users with delete permissions can delete undesired tags under this section. They can also assign/change or remove a color assigned to a specific tag;
-
To change the permissions, check the Roles Permissions page under Admin.