Our bulk upload feature will allow you to mass input data into iO
Table of contents
Copy-Paste from an Excel Sheet
Explorer > Open a Report > Click on the "+" sign in the top-left corner
Using an Excel file or a spreadsheet, you'll be able to copy-paste your data into a table view on iO.
This means that you can either gather data offline, unify Excel reports from your team or use CSV files to upload open-source or pre-existing organizational data into your report.
- Once you click on the + sign, a new form will open to add data manually;
- In the top right corner of this form, you will find a grid icon;
- A table will appear when you click this icon, as shown in the example below;
- You can start entering the records manually here, one after another, or simply copy-paste from your Excel;
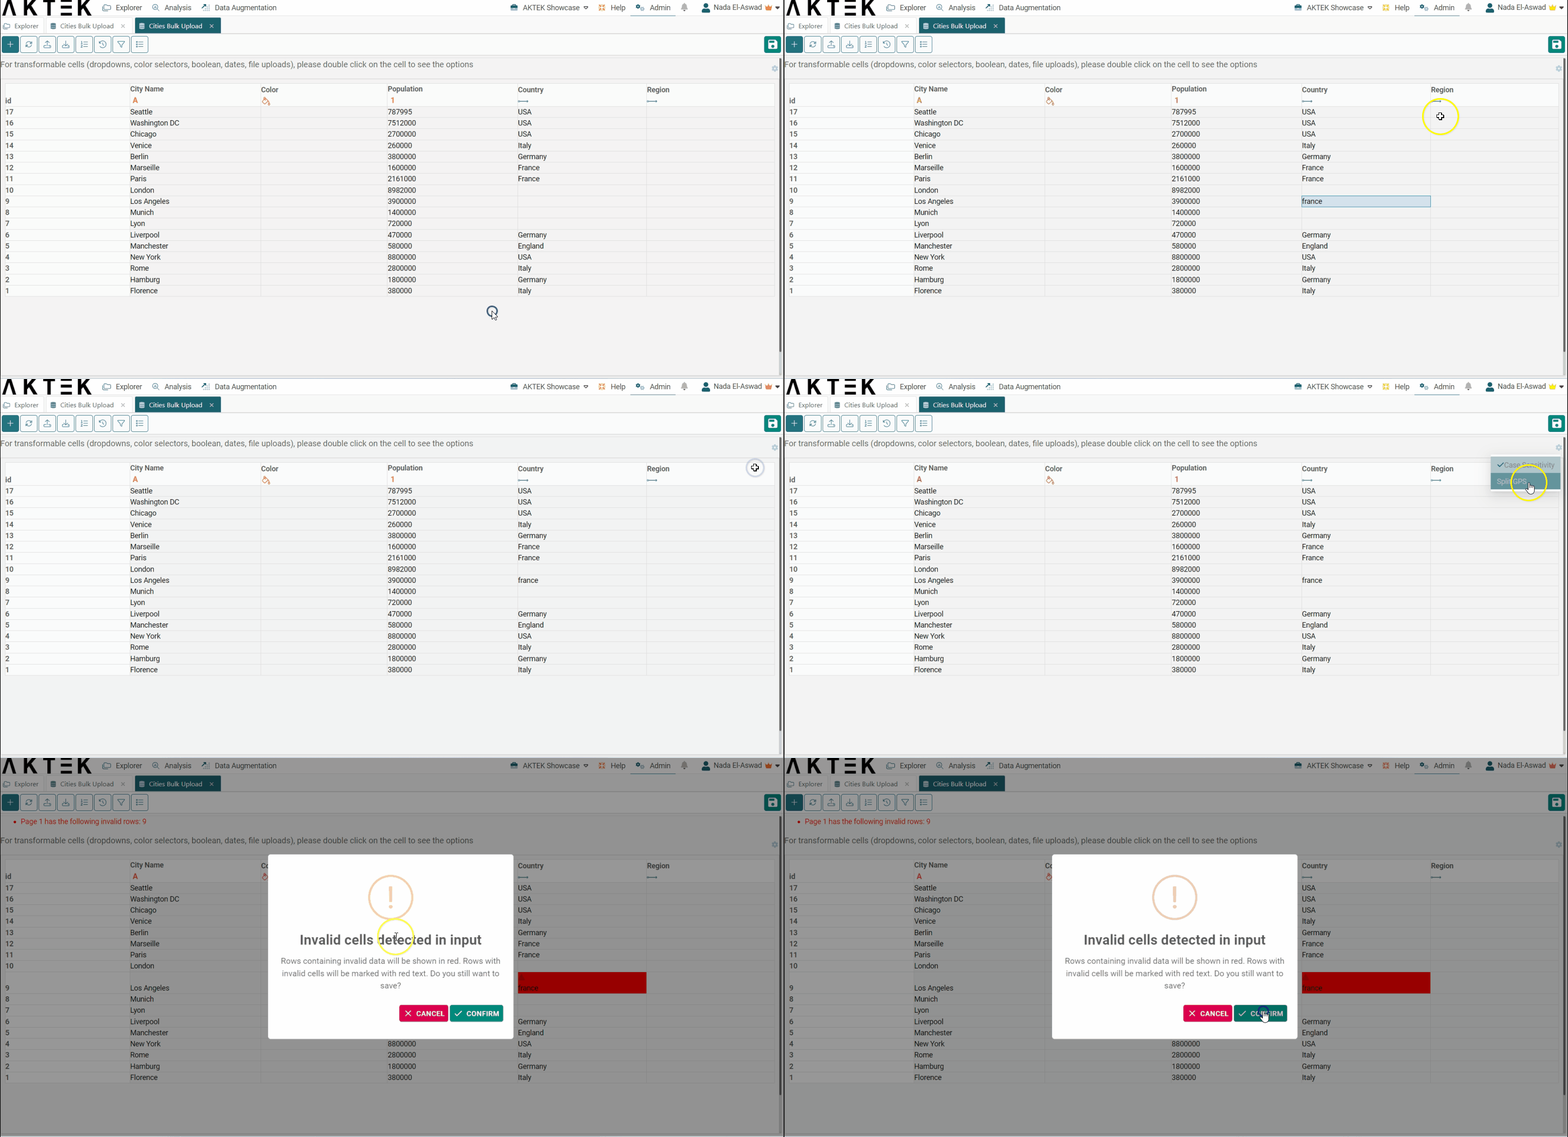
- Click on Save.
- After that, the system will do all the above checks and will highlight the problematic cells in red so it can check which one is causing the error. You can either manually fix the problematic cell(s) and save again, or ignore the errors and only save the valid rows.

✅ As you know from our Data Structure page, you can add several types of fields to your reports and manually input data. It is important to note that you can bulk upload most of the field types, including single reference, multiple reference, and connected reference.
✅ Some field options are not supported in a bulk upload. However, for these fields, you still have the option to upload one by one by clicking on the cell and then on the upload button. These fields are:
- Image
- Video
- Generic File
✅ Application fields, Automatic Fields, and the formula field will be automatically filled out by the system, based on the user/time in which the Bulk Upload is uploaded.
✅ The GPS field should be in decimal format separated by a comma. (Lat, Lng).
💡 If you are copying pre-defined fields or reference fields, make sure that you are using the exact name/option as defined on iO. For Reference fields, the system will automatically treat any non-existing value as a new entry and include it in the linked data structure. However, if you want lowercase variations to be treated as distinct entries, you can activate the Case Sensitivity option from the matrix settings.
💡 By default, you can add up to 100 rows. If you want to add more, please specify this number at the bottom of the page to make sure you have enough rows on your matrix.
⚠️ Make sure to fill all mandatory fields in a row. Otherwise, the system will show you an error when you try to save.
⚠️ When you copy a Date or Date/Time field, make sure that the column in your Excel file has a text format and not a date format.
⚠️ Conditional fields will be disabled if the condition is not met. If you are pasting the data and the condition is not met, the conditional field will be left blank or locked.
Matrix Settings
On the right corner of the matrix (under the Save icon), click on the settings icon. You will see these 2 options:
- Case sensitivity: This feature is now turned off by default, meaning that lowercase and uppercase entries will be treated as separate values.
- Split GPS: Enabling this option will display two separate columns on the screen where you can enter the latitude and longitude values individually. However, after saving, the system will automatically merge these values together into a single GPS field.

Use the Excel Connector
This option, also called Import Data From Files, is not only about bulk uploading your data into a table. It will allow you to import your files, using different ways, it will create your data structure from scratch and append your data to the newly-created or existing data structure.
This option can be accessed from 2 places:
- From your report (table view), click on the Bulk Upload icon.
- From Admin > Data > Import data from files.
💡 For more information about this option, please access this article.
